Sunday, February 27, 2011

Stay Classy IPA, February 27, 2011

I'm getting a bit excited for this year's AHA Conference here in San Diego.  The conference is hosted by a different city each year and usually it's too far to travel.  This will be my first National Homebrewers' Conference and I'm looking forward to all the fun other members in my homebrew club, QUAFF, talk about each year (yes, some go every year!).
Want to go!?  Better register soon, the conference is selling out fast!
One of the famed events during the conference is club night.  I know I can count on QUAFF to fully represent with a great showcase of homebrews and energy.  I haven't heard an announcement yet but I know that QUAFF will soon be asking us to contribute kegs for club night.  While hoppy is something I've always enjoyed, I haven't brewed hoppy in quite some time (probably since IPA pours out of drinking fountains around here!).  Here's to my renewed adventures in homebrews drenched in IBUs and contributing to the masses of hop heads at NHC.  Not sure if this beer will be around by then but you can count on this brew to be good learning ground.

Vessel Calibration in BeerTools Pro
One of the key draws to using brewing software is the ability to calculate strike and target temperatures during the mash.  It would enable you to better hit your temps when variables such as volume, time, and temperature change.  In BeerTools Pro, it allows you to run basic experiments to establish heating parameters for your brewing equipment.  Basically, calibration involves pouring a selected volume of heated water in each your mash tun, hot liquor tank, and kettle to measure the amount of heat loss over a specific amount of time.  The software also allows you to test your heating element to measure how fast you can heat a selected volume (useful for estimating heating times). 
Kettle calibration in BeerTools Pro to determine heat properties.
Before the software, it has been a bit of art and skill to hit desired mash temperatures.  A homebrewer gets to know his/her equipment with experience and eventually, it gets easier to hit your target temps. The problem was that I can sometimes be a couple of degrees off.  Seems to not be a very big deal but enzyme activity can be very temperature specific.  If you ever want to recreate the conditions that made that great beer, it's imperative to know how to hit your desired temperatures every time.
I would be very happy if I can trust the software to guided me to my mash temperatures every time.  After today's batch, it is apparent that I have a bit of tweaking to do.  I'm not sure if I should go through the calibration process again (for the mash tun only) or simply tweak the time point temperatures to match the observed temperatures during a brew day.  Oh, I should also verify/calibrate my thermometer before doing so (or would it an unknown thermometer provide acceptable relative values?) and for future brews.
Today's Mash Schedule with calculated strike temperatures in the Temp column.
Looking above, I heated my 3.44 (or close to that) gallons to 171.5°F for mash-in.  After 3 minutes of stirring and stabilizing, the mash was moderately consistent at 153°F.  Close enough for me and I was pretty excited.  At the end of the saccharification rest, BeerTools shows that I should have lost enough heat to have a final temp of 147.4°F.  My actual ending temperature was 152°F (only a loss of 1°).  Perhaps if I simply adjust my Mash Tun Calibration parameters for "Temp. After 5 Minutes" to lose 1° less and "Temp. After 65 Minutes" to show a total loss of also just 1°, I might be able to make this work. 
On to the beer,  check out that ingredient list!  Insane.  I used to try and simplify as much as possible (less is more) and now my homebrews are practically including the kitchen sink.  The ingredient list doesn't even include the adjusted water profile and salts.  As for the IBUs, doesn't the calculated 112.3 seem to be just too far out there for this hop schedule!?  I'll save that issue for another time, I need to chillindamos!

Stay Classy IPA

14-B American IPA
Author: Chillindamos
Date: 2/27/11
BeerTools Pro Color Graphic
Size: 5.0 gal
Efficiency: 74.78%
Attenuation: 75.0%
Calories: 217.06 kcal per 12.0 fl oz
Original Gravity: 1.065 (1.056 - 1.075)
|===============#================|

Terminal Gravity: 1.016 (1.010 - 1.018)
|====================#===========|

Color: 6.85 (6.0 - 15.0)
|=========#======================|

Alcohol: 6.41% (5.5% - 7.5%)
|===============#================|

Bitterness: 112.3 (40.0 - 70.0)
|================================|

Ingredients:

9.0 lb 2-Row Brewers Malt
1.0 lb German Vienna
0.5 lb Belgian Munich
0.5 lb Crystal Malt 20°L
3.0 tsp 5.2 pH Stabilizer - added during mash
1.0 lb Dried Rice Extract
1.0 oz Homegrown Chinook (11.0%) - added first wort, boiled 90.0 min
1.0 oz Magnum (10.6%) - added during boil, boiled 60.0 min
1 tsp Whirlfloc Tablets (Irish moss) - added during boil, boiled 15.0 min
1.0 oz Homegrown Chinook (11.0%) - added during boil, boiled 10.0 min
1.0 oz Homegrown Centennial (10.0%) - added during boil, boiled 10.0 min
1.0 tsp Servomyces - added during boil, boiled 10.0 min
0.1 tsp Anti-Foam - added during boil, boiled 1.0 min
0.5 oz Simcoe (12.3%) - added during boil, boiled 0.0 min
0.5 oz Citra (14.0%) - added during boil, boiled 0.0 min
0.5 oz Amarillo (8.5%) - added during boil, boiled 0.0 min
1.0 ea White Labs WLP001 California Ale (update later)
0.5 oz Simcoe (12.3%) - added dry to secondary fermenter
1.0 oz Citra (14.0%) - added dry to secondary fermenter
0.5 oz Amarillo (8.5%) - added dry to secondary fermenter

Schedule:

Ambient Air: 60.0 °F
Source Water: 60.0 °F
Elevation: 0.0 m
00:14:26 Mash-In - Liquor: 3.44 gal; Strike: 171.48 °F; Target: 152.0 °F
01:14:26 Saccharification Rest - Rest: 60.0 min; Final: 147.4 °F
01:24:26 Vorlauf, bitches! - Rest: 10.0 min; Final: 146.7 °F
02:24:26 Fly Sparge - Sparge Volume: 5.1 gal; Sparge Temperature: 168.0 °F; Runoff: 5.74 gal

Notes

70% dilution rate. 4 grams Gypsum, 1 gram Epsom Salt, and 1 gram of Baking Soda added to the mash. Chinook and Centennial hops are grown at our hop farm (IBUs estimated). Mash dilution ratio: 1.04 Tap, 2.41 Water Lady (3.44 gallons total). HLT dilution ratio: 1.51 tap, 3.59 Water Lady (5.1 gallons total). Oxygen added for 60 seconds. OG 1.065 @ 66°F. 1 vial to 800ml yeast starter (used dark malt extract which should have a small impact on resulting SRM). Recently finished calibrating all vessels and mostly was able to use BeerTools software to predict target temperatures. Mash-in was over my 1°F which is close enough that I simply continued to stir the mash for a few more minutes. The calculated final temperature for the saccharification rest was the most off, about 5°F lower.
Results generated by BeerTools Pro 1.5.12


Turned out to be an awesome IPA. Kara tested for IBUs: 84.5. This value is actually higher than what I expected and certainly more than what is perceived. If I were to guess, I would say that it's around 65 IBUs.  The next IPA brewed has some minor changes and more hops.  Will be nice to also have that tested to see if the value is a tad higher than 84.5 IBUs.

Saturday, February 26, 2011

Back in Black Schwarzbier, February 21, 2011

In November I brewed a Schwarzbier that I really liked.  It was on tap at our annual New Year's Big Bear Bash.  As a dark colored beer, some of our drinking crowd steered clear while others wanted to  compare it to a stout or porter.  I feel this style is a hidden gem.  Possibly with educating drinkers and the right breweries making it, Schwarzbier could easily become another great addition to a craft beer pub's tap lineup.
After some more research and thinking about the last batch, I wanted to give this style another try.  I ordered Sinamar from William's Brewing as a suggested means to darken the beer without adding too much roasted character to the beer.  The goal was to darken just enough to get in the truly dark range while adding very little roasted flavor.
Sinamar Beer Coloring. Each ounce adds 5 SRM.
My mash was calculated to be 14 SRM and 2 ounces of Sinamar picked up another 10 SRM to fall right in the BJCP Category 4C color range for Schwarzbier.  Sinamar is derived from a process using Carafa yielding a lower bitter flavor than you'd otherwise expect from mashing with roasted grains (Black Patent, Roasted Barley, Chocolate, etc).  I finally spotted it at my local homebrew store yesterday so I'd imagine that Sinamar is becoming readily available.
Sinamar pours thick!  Consistency of a thick syrup.  Tastes lightly roasted.
Outside of using Sinamar, I will be slightly breaking the category boundaries of hop bitterness, flavor, and aroma.  I'm thinking that a month of lagering will likely bring the hop profile down to an acceptable level.  This is also the first time using Charlie Papazian's yeast strain, Cry Havoc.  This is a very versatile yeast strain (ales and lagers) and Charlie has used this for a breadth of styles. As always, I will update this post with finishing details at a later time.  Cheers!

Back in Black Schwarzbier

4-C Schwarzbier (Black Beer)
Author: Chillindamos
Date: 2/21/11
BeerTools Pro Color Graphic
Size: 5.0 gal
Efficiency: 75.0%
Attenuation: 75.0%
Calories: 167.46 kcal per 12.0 fl oz

Original Gravity: 1.050 (1.046 - 1.052)
|===================#============|

Terminal Gravity: 1.013 (1.010 - 1.016)
|==============#=================|

Color: 24.25 (17.0 - 30.0)
|====================#===========|

Alcohol: 4.95% (4.4% - 5.4%)
|================#===============|

Bitterness: 34.8 (22.0 - 32.0)
|============================#===|

Ingredients:

5.0 lb Belgian Munich
3.0 lb Pilsner Malt
1.5 lb Vienna Malt
2 oz German Carafa II
3.0 tsp 5.2 pH Stabilizer - added during mash
2 oz Sinamar - added during boil, boiled 60.0 min
0.25 oz Magnum (14.5%) - added during boil, boiled 60.0 min
0.5 oz Czech Saaz (5.0%) - added during boil, boiled 60.0 min
1.0 tsp Whirlfloc Tablets (Irish moss) - added during boil, boiled 15.0 min
1.0 oz Czech Saaz (5.0%) - added during boil, boiled 10.0 min
1.0 oz Spalt Spalter (4.8%) - added during boil, boiled 3.0 min
1.0 oz Czech Saaz (5.0%) - added during boil, boiled 3.0 min
2.0 ea White Labs WLP862 Cry Havoc

Schedule:

Ambient Air: 70.0 °F
Source Water: 60.0 °F
Elevation: 0.0 m
00:08:24 Mash-In - Liquor: 2.17 gal; Strike: 140.41 °F; Target: 124.0 °F
00:13:24 Protein Rest - Rest: 5.0 min; Final: 123.7 °F
00:15:24 Second Infusion - Water: 1.2 gal; Temperature: 211.8 °F; Target: 150 °F
01:15:24 Saccharification Rest - Rest: 60.0 min; Final: 146.0 °F
01:25:24 Vorlauf, bitches! - Rest: 10.0 min; Final: 145.3 °F
02:25:24 Fly Sparge - Sparge Volume: 5.1 gal; Sparge Temperature: 170.0 °F; Runoff: 5.66 gal

Notes

Sinamar adds 10 SRM (5 SRM per ounce in a 5 gallon batch). 70% dilution rate of San Diego Alvarado Water. 1 gram of Calcium Carbonate and 2 grams of Gypsum added to the mash. OG 1.052 65°F. Oxygen added for 1 minute via aeration stone. Lager cave temperature at 55°F.
Results generated by BeerTools Pro 1.5.12

Using Sinamar with BeerTools Pro
I needed to modify the SRM from the BeerTools Pro exporter above.  The Sinamar was a custom ingredient entered into the database under special ingredients.  There's no details to input other than the name, origin, description, and cost.  I also changed the jpg displayed to the correct SRM image.  Not a big deal but another item on my list to suggest as a feature, coloring ingredients.

Wednesday, February 23, 2011

Hop Farm Season 2011 Begins!

Around this time of year, it's usually a good idea to start getting ready for the upcoming hop growing season.  My hop farm is located in sun drenched San Diego North County.  I have three terraced rows on a north-facing slope.  Each row is setup to accommodate ten mounds (for a total of 30 mounds) which seems more than enough to handle on a casual basis.  Here's several images to show the preseason hop farm:
Hop Farm from the top of the mulch hill.
Hop Farm from the east.
Detail of the terraces with lots of weeds to pull.
Hop Farm from the lower east slope.
Hop Farm from the lower west slope. Avocado tree to the right.
Today, Michelle and I set out mostly to start weeding and mulching.  The ground was nicely wet from recent rains so the weeds were easy to pull. While we worked for quite some time, we were only able to take care of the top row (Chinook and Centennial).  Next weekend we will try to recruit Kara to come and help with the bottom two rows (although the outlook looks like rain again).
My wife, Michelle, taking out those weeds!
After the weed pulling (which never stops) and mulching, we'll need another work day to prune the mounds.   Essentially, this involves shoveling and cutting around the mound to trim down the roots to prevent the plants from popping up away from the mound.  This should also present opportunities to find rhizomes to share with others.  I have a few QUAFF buddies already signed up for Chinook and Centennial rhizomes.
Hop Farm Row 1 (Chinook and Centennial) weeded and mulched.
Beyond pruning comes trellis maintenance and restringing.  All of my posts seem to be in good condition this year.  I will need to re-anchor the end-posts of each row to help keep the top guide-line taut.   A small buried cement block might do the trick.  I know that hop farms restring each year with twine but I have been using wire.  I'm finding the wire tends to rust out after one or two season so perhaps I should also look into finding a better solution for this as well.
Row 1 from the west, after weeding and mulching.
Another concern, I need to find better solutions for the problem with rabbits and gophers chewing on the vines.  In some cases, these wascal wabbits have chewed mature cone bearing vines that essentially put an early season stop to some of my mounds.  Possibly a simple chicken-wire cage will keep the nasty gnawers at bay.  See some of my previous hops seasons' blog posts on this topic and more.
One Chinook hop mound seems to already be breaking soil.
As for this year's last planning element, I want to replace all the mounds in the middle row with two new varieties of "C" hops.  While the former two varieties,  Magnum and Vojvodina, had a good running, last year had a significant decrease in viability and yield.  It's time to get rid of these and move on.  Considering the success of my Chinook and Centennial mounds, I believe other "C" hops will likely do as well.  I recently pre-ordered Columbus hops and am crossing my fingers for Cluster or Citra to be available this year.  Even Simcoe (we'll write it "Cimcoe" to keep with the theme) would be desirable.

Here's a couple of links for buying rhizomes directly from the source.  As of now, no rhizome source has a list of what will be available this year.  Several homebrew suppliers and stores will also have rhizomes available beginning next month.  I got really excited when More Beer! announced their rhizome pre-order a couple of weeks ago and jumped at the chance to order Columbus hops.  Their pre-sale deal is only good until March 1st.
Rhizomes from Hops Direct
Rhizomes from Northwest Hops

Hops Direct made a YouTube video series last season to show the hop farming process.  They're great if you haven't seen them yet.  Hop farmer guru at Hops Direct, Stacy Puterbaugh, shows you how to plant hops and even what a large scale hop harvest looks like.  I'll share some of these videos here as the season moves on.

Hops TV, Episode 1: Planting Hops

Sunday, February 20, 2011

Belgian Lager, February 6, 2011

White Labs has a new platinum yeast strain available right now (January-February) that I want to try out: White Labs WLP815 Belgian Lager Yeast.  I thought I'd try busting the BJCP guidelines for a generously hopped lager using this strain.  Hoppy lagers are rare and it this brew should be a great testament to using water adjustments to match the lighter malts while accentuating the bitterness.  Here's White Lab's description of WLP815:
WLP815 Belgian Lager Yeast
Clean, crisp European lager yeast with low sulfur  production. The strain originates from a very old brewery in West Belgium. Great for European style pilsners, dark lagers, Vienna lager, and American style lagers.
Attenuation: 72-78%
Flocculation: Medium
Optimum Fermentation Temperature: 50-55°F (10-12°C)
Alcohol Tolerance: 5-10%
Water Chemistry Planning:
With water chemistry for this batch, playing with the numbers landed me with blending 20/80% of my tap water with purified drinking water from The Water Lady.  I also added to the mash 2 grams of gypsum to give a gentle boost to the calcium and sulfate concentrations.  (Note to self - 1 teaspoon of Gypsum is 4 grams.) 
Adjusted mash chemistry after blending water sources and gypsum.
Above and below are snapshots of my Step 7 from Palmer's water calculator (Version 2).  Maybe someone out there can help me understand this, why do I often see negative values for residual alkalinity? Even with this mystery, looks like I'm in the ballpark.    According to Jamil and John in Brew Strong's Waterganza podcast series on The Brewing Network, getting in the the desired range is good enough.  The calculator shows that my target residual alkalinity range for an 8 SRM beer should be in the range from -25 to 34.  Again, what do negative values mean!?
Why do I keep seeing negative values for residual alkalinity?
Creating a Mashing Schedule Using BeerTools Pro:
Along with my new experiences with water adjustments, I'm also trying to tailor BeerTools Pro to my brewing process.   My latest challenge using this brewing software is with calculating mash volumes and resulting temperatures.  With this beer, I wanted to do a multi-step infusion involving a short protein rest.  My experience with my equipment led me to my target temperatures for the protein and saccharification rests but I really want the software to do work for me!
Mashing Schedule snapshot from BeerTools Pro.
For my next batch, I need to pay attention more to volumes since I'm certain that I collect more than 5.51 gallons in my kettle after the sparge.  To get the above values, I had to do lots of tweaking with numbers.  Maybe since I was working backwards (actual values of water infusions and temperatures) rather than forward planning?  I'll document temps and volumes a bit more closely next time and see if can better calibrate the software to my process.

Quick Protein Rest:
With lagers, especially when using pilsner malt, I have been doing a quick protein rest (between 122-124°F) at the start of my mash.  Previously, I was doing the rest for about 20 minutes but a discussion with an esteemed QUAFF colleague, Harold Gulbransen, convinced me to to  shorten the rest as much as possible.  Here's my refined protein rest procedure that gets me in and out of a protein rest within about 7 minutes:
Using 0.9 quarts per pound of grain, raise water to 135°F and pour into mash tun.  Add any salts and grain.  Stir to break up and clumps and distribute temperature.  Simultaneously heat additional water to boil at a rate of 0.5 quarts per pound of grain.  After about 2 minutes of stirring, I check the mash temperature (usually hits 122°F).  In less than 5 minutes, my second infusion water is at a boil.  When boiling, I add this infusion to the mash tun and stir for about 2-3 minutes to distribute the heat evenly.  After stirring, check temperature (usually 148-152°F). 

Hey BeerTools Pro, as for the HTML export below, I find myself editing the code to clean up the "look" quite a bit.  I would really like the ability to create an export template to customize the elements and appearance.  Could you please consider this feature for future updates!?

Will update actual Final Gravity and finishing details later!

Belgian Lager

BJCP Category 23-A Specialty Beer
Author: Chillindamos
Date: 2/6/11
BeerTools Pro Color Graphic
Size: 5.0 gal
Efficiency: 70.04%
Attenuation: 77.8%
Calories: 178.9 kcal per 12.0 fl oz

Original Gravity: 1.054 (1.026 - 1.120)
|============#===================|

Terminal Gravity: 1.012 (0.995 - 1.035)
|==============#=================|

Color: 7.9 (1.0 - 50.0)
|==========#=====================|

Alcohol: 5.51% (2.5% - 14.5%)
|============#===================|

Bitterness: 82.0 (0.0 - 100.0)
|=====================#==========|

Ingredients:

7.0 lb Belgian Pils
3.0 lb Belgian Munich
1.0 lb Vienna Malt
1.0 tsp 5.2 pH Stabilizer - added during mash
1.0 tsp Anti-foam - added during boil, boiled 90.0 min
1.0 oz Magnum (14.5%) - added during boil, boiled 60.0 min
1.5 oz Czech Saaz (5.0%) - added during boil, boiled 15.0 min
1.5 oz Spalt (4.8%) - added during boil, boiled 15.0 min
1.0 oz Czech Saaz (5.0%) - added during boil, boiled 1.0 min
1.0 oz Spalt (4.8%) - added during boil, boiled 1.0 min
1.0 tsp Whirlfloc Tablets (Irish moss) - added during boil, boiled 20.0 min
2.0 ea White Labs WLP815 Belgian Lager Yeast

Schedule:

Ambient Air: 70.0 °F
Source Water: 60.0 °F
00:07:57 Mash-In - Liquor: 2.47 gal; Strike: 138.5 °F; Target: 123 °F
00:12:57 Protein Rest - Rest: 5.0 min; Final: 122.7 °F
00:14:57 Second Infusion - Water: 1.35 gal; Temperature: 212.0 °F; Target: 149.2 °F
01:12:57 Saccharification Rest - Rest: 58.0 min; Final: 145.8 °F
01:15:57 Mash-Out Infusion - Water: 1.28 gal; Temperature: 170 °F; Target: 151.1 °F
01:25:57 Vorlauf, bitches! - Rest: 10.0 min; Final: 150.6 °F
02:55:57 Fly Sparge - Sparge Volume: 5.1 gal; Sparge Temperature: 170.0 °F; Runoff: 5.82 gal

Notes

OG 1.054 @ 68°F. Uses 77% premium drinking water from The Water Lady and 33% filtered San Diego Alvarado water. 2 grams of Gypsum added to the mash. Primary ferment in the lager cave at 52°F fin a 6 gallon better bottle for 2 weeks. Rack to secondary for 4 weeks at primary temps before stepping down 2°F per day to lagering temps at 38°F. Update 2/20, racked over to a secondary but didn't have my hydrometer at the lager cave to take a gravity reading. Will ramp up to 60's next week.
Results generated by BeerTools Pro 1.5.12

Saturday, February 19, 2011

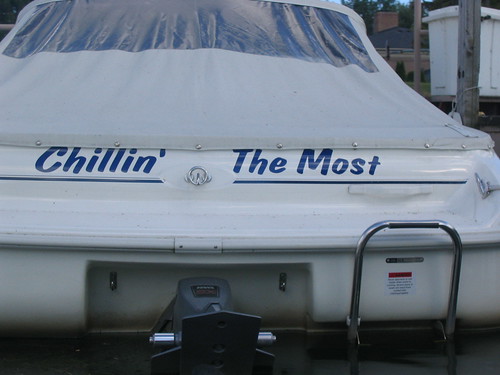
Chillin' The Most

Just did a quick search to find these gems:

My kind of shirt. Have one already!
My kind of flag. Need one.
My kind of boat. Can't afford.

Burton Ale, January 30, 2011

In this past issue of Zymurgy, Martyn Cornell and Antony Hayes outlined the ultimate English comfort beer, Burton Ale.  With Kara of White Labs also wanting to try out White Labs WLP023 Burton Ale Yeast, we decided to give this style a try.  I don't recall ever having a Burton Ale nor do I believe it's available in our very rich beer community of San Diego.  I suppose in the earlier days of homebrewing of Dave Line and Charlie Papazian, you would simply need to make a style just to be able to try it.
Burton Ale: A British Comfort Beer - Article from Zymurgy Vol. 34 No. 1
I would like to do more long term projects like this one.  In the article, Cornell and Hayes explain that aging is an important component to Burton Ales and suggest a year to 18 months.  I will do just that.  My only limitation is that our house tends to warm up quite a bit towards the end of summer.  At this time, I will transfer the beer to a Cornelius keg and continue aging in my kegerator or the lager cave.

As for using water adjustments as per my Brew Year's Resolution, I tried to follow the suggested recipe guidelines for this beer.  Total Alkalinity (as Calcium Carbonate) between 100-120ppm and free calcium between 180-220ppm.  Using the Palmer's water calculator, I determined that my San Diego water would be a good starting point.  I played with salt adjustments and decided to add Gypsum and Epsom Salts to the mash water.  Calculated based on annual average analysis of my tap water, the additions will give an adjusted calcium of 183ppm and a residual alkalinity as calcium carbonate at 124ppm.  Sulfates are in the red (565ppm) from these additions though it seems acceptable to the Burton on Trent water profile that this beer is based on.
Could have used some anti-foam or a blow-out tube for this Burton Ale.
I will follow up with details here as the year progresses though as with any long-term project, it's best to just forget about it!  I have two other long-term beers in progress: American Barley Wine and an Oud Bruin.  Forget about those too!

Burton Ale

BJCP Category 19-A Old Ale
Author: Chillindamos
Date: 1/30/11
BeerTools Pro Color Graphic
Size: 5.0 gal
Efficiency: 69.7%
Attenuation: 78.7%
Calories: 266.52 kcal per 12.0 fl oz

Original Gravity: 1.080 (1.060 - 1.090)
|==================#=============|

Terminal Gravity: 1.017 (1.015 - 1.022)
|============#===================|

Color: 17.82 (10.0 - 22.0)
|==================#=============|

Alcohol: 8.32% (6.0% - 9.0%)
|====================#===========|

Bitterness: 112.3 (30.0 - 60.0)
|================================|

Ingredients:

13.0 lb Maris Otter Pale
1.0 lb Belgian Munich
4.0 oz American Chocolate Malt
1.0 tsp 5.2 pH Stabilizer - added during mash
1.0 lb Light Brown Sugar
6.0 oz East Kent Goldings (5.0%) - added during boil, boiled 60.0 min
2.0 oz East Kent Goldings (5.0%) - added dry to secondary fermenter
1.0 tsp Whirlfloc Tablets (Irish moss) - added during boil, boiled 15.0 min
2.0 ea White Labs WLP023 Burton Ale

Schedule:

Ambient Air: 70.0 °F
Source Water: 60.0 °F
Elevation: 0.0 m
00:14:54 Mash-In - Liquor: 3.56 gal; Strike: 172.25 °F; Target: 152.0 °F
01:14:54 Saccharification Rest - Rest: 60 min; Final: 148.2 °F
01:24:54 Vorlauf, bitches! - Rest: 10.0 min; Final: 147.6 °F
02:34:54 Fly Sparge - Sparge Volume: 5.1 gal; Sparge Temperature: 170.0 °F; Runoff: 7.02 gal

Notes

Added 7 grams of Gypsum and 3 grams of Epsom Salts to the mash tun using 100% San Diego Alvarado filtered water. OG: 1.080 @ 68°F Used two vials of WLP023 to make a 900ml starter the night before. Stir plate used. Oxygenated wort for 60 seconds. Primary ferment in 6 gallon Better Bottle at ambient household temperatures (60-63°F). Blow out for nearly two days! Will age in secondary for at least 5 months before kegging. Cold age in the keg for another 6 months or so. Dry hop with 2oz. East Kent Goldings two week prior to full carbonating pressure for serving. Update 2/23: Racked the Burton Ale over to secondary. Current gravity is 1.017 @ 58°F. It will age here until my cellaring location in the house warms up too much.
Results generated by BeerTools Pro 1.5.12

BeerTools Pro Needed Features
Hey, BeerTools Pro!  I'd like to customize a template for exporting to HTML.  Could you do this please!?  In this template, I'd like to have the option to turn on/off components and stylize the way I want it to display.  I would like to be able to add water chemistry and fermentation details (including aeration/oxygen) to the export.  Other stuff - adjusted gravity based on an input temperature, water and salts as ingredients, fermentation details (vessels, temps, racking, time), adding dry hopping along with its' time and method, yeast pitching rate calculator for starters etc. based on OG and yeast type as on Jamil's website (Jamil's Yeast Pitching Rate Calculator).

References:
Cornell, Martyn, and Antony Hayes. "Burton Ale: A British Comfort Beer." Zymurgy 34.1 (2011): 22-25. Print.

Sunday, February 13, 2011

Blueberry Wheat, Special Edition, February 10, 2011

Alas!  It has been way to long.  I've been spending a huge chunk of time focusing on my Brew Year's resolution to make brewing water adjustments and to use software for planning and process documentation.  In doing so, I've missed blogging two other brewing sessions besides this one.  Those two future blog entries, Burton Ale and Belgian Lager, will be posted very soon.  I've seemed to finally grasp the basics of using John Palmer's water RA spreadsheet and using BeerTools Pro for Mac.
As for making water adjustments, I've taken the recommendation from several homebrewers to use John Palmer's Mash Residual Alkalinity Spreadsheet.  Here's the download link to the Excel spreadsheet if you want to try it out: Palmers_Mash_RA_ver2.xls.  There's also a very recent update but I haven't checked it out yet: Palmers_Mash_RA_ver3ptO.xls.  If you do some reading about Palmer's spreadsheet and water calculations, you'll find that there's a great discussion happening about technical/chemical issues with his calculations, hence version 3.  Even with the new version, there still seems to be some unanswered questions and potential issues.

Using the spreadsheet takes some initial learning but I found no harm done playing with several scenarios before trying it out for actual planning purposes.  I found it very useful to listen to the Brew Strong Waterganza podcast series on The Brewing Network: Podcast 1 - Why Adjust Your Water - Podcast 2 - How to Adjust Your Water - Podcast 3 - Adjusting Water to Styles - Podcast 4 - The Final Answers  After picking up a small variety of brewing salts and starting to utilize a local purified drinking water source, it has been exciting to add water adjustments to my homebrewing repertoire. 
Here's the spreadsheet for this brew.  Simply dilutions.  No salts were needed.
This is a learning process and while this brew's water profile needs further adjustment (could have used calcium chloride), I'm excited to use water as the basis for future experimentation.  Notice that the chloride to sulfate ratio determines that hop perception will be "Bitter".  With a tad of calcium chloride, the ratio would be more "Malty" focused and better suited to the profile I'm looking for in my Blueberry Wheat.  As I said, it will be a process, and a fun one at that. 

As for using BeerTools Pro for Mac, I'm finding it easy to use and frustrating at the same time.  Time will tell if I can become acclimated and work around its' nuances.  I've found their documentation to be very useful and the calculations to be fairly accurate.  I particularly enjoyed running the experiments on my equipment to determine heat capacity and their coefficients.   Here's a quick snapshot of using BeerTools Pro with the Blueberry Wheat Ale:

BeerTools Pro snapshot showing Special Ingredients and Mashing Schedule.
One of the end products I truly desire is exporting the details for blogging purposes.  BeerTools can export straight to HTML and the results are copied below.  A couple of complaints I have are the inability to document fermentation details and that water adjustments and profiles used in their calculators can't be exported along with the other details seen below.  Perhaps these features are there!?  I haven't looked really far into these issues yet and so it seems the only way to make this happen is using the "Notes" feature.

On to the beer!  I've made a few small changes to this favorite homebrew of mine.  It's really not MY favorite, but many of my great friends absolutely love this homebrew.  I will admit that it is truly a great drinker and even an experienced beer judge has said that a previous edition was one of the best fruit beers he's ever had.  So why would I even consider changing it, you ask!?  For the fun of it, of course!  Why settle for good when great is within reach?  In this case, why settle for great when I hear water adjustments can send a beer to outstanding!?

One of my truly best friends and favorite peops, Andrew, just got engaged and this beer is for him.  The Blueberry Wheat has been his favorite homebrew and beer.  I'm plugging for an engagement party to feature this beer.  Andrew also has an amazing food blog, check it out: Eating Rules.  Cheers!
Here's the brewing details from BeerTools Pro.  I will update at a later date with finishing details. Two other blog posts for Burton Ale and Belgian Lager coming soon as well.  Oh, and I've making some Chianti from a kit and will also write about that process too!

Blueberry Wheat, Special Edition

BJCP Category 20-A Fruit Beer
Author: Chillindamos
Date: 2/10/11
BeerTools Pro Color Graphic
Size: 5.0 gal
Efficiency: 70.0%
Attenuation: 88.1%
Calories: 159.42 kcal per 12.0 fl oz

Original Gravity: 1.049 (1.026 - 1.120)
|===========#====================|

Terminal Gravity: 1.006 (0.995 - 1.035)
|============#===================|

Color: 4.2 (1.0 - 50.0)
|=========#======================|

Alcohol: 5.65% (2.5% - 14.5%)
|============#===================|

Bitterness: 16.4 (0.0 - 100.0)
|==========#=====================|

Ingredients:

6.08 lb Red Wheat Malt
2.93 lb 2-Row Brewers Malt
0.98 lb Belgian Pils
2.9 tsp 5.2 pH Stabilizer - added during mash
1.46 oz German Spalt (3.0%) - added during boil, boiled 60 min
1.0 tsp Whirlfloc Tablets (Irish moss) - added during boil, boiled 15.0 min
2. ea White Labs WLP001 California Ale
0.1 tsp Anti-Foam - added during boil, boiled 90.0 min
0.1 tsp Anti-Foam - added during boil, boiled 1.0 min
2.0 oz Blueberry Extract

Schedule:

Ambient Air: 65.0 °F
Source Water: 58.0 °F
00:11:31 Mashing-In - Liquor: 2.49 gal; Strike: 169.49 °F; Target: 148.0 °F
01:11:31 Saccharification Rest - Rest: 60 min; Final: 142.7 °F
01:14:31 Mash Out Infusion - Water: 1.54 gal; Temperature: 170.0 °F; Target: 151.7 °F
01:24:31 Vorlauf, bitches! - Rest: 10.0 min; Final: 151.0 °F
02:34:31 Sparge - Sparge Volume: 4.88 gal; Sparge Temperature: 170.0 °F; Runoff: 5.83 gal

Notes

OG: 1.050 @ 66°F Oxygen aeration for 60 seconds. Pitched two vials of WLP001 California Ale. Fermenting at 63-66°F for two weeks in the primary. After 48 hours, the Anti-Foam seems to be keeping the krausen under control. I typically have a fermentation blowout with this type of grain bill (using wheat). Water was diluted 72% using RO water. On 2/23: Racked over to secondary. Current gravity is 1.006 @ 58°F.
Results generated by BeerTools Pro 1.5.12